Juice Cartons to a Tiny Garden
- Why this project works for kids
- Materials and safe preparation
- Planting step by step
- Daily care and simple troubleshooting
- Learning activities and family engagement
- When to harvest and what to do next
Why this project works for kids
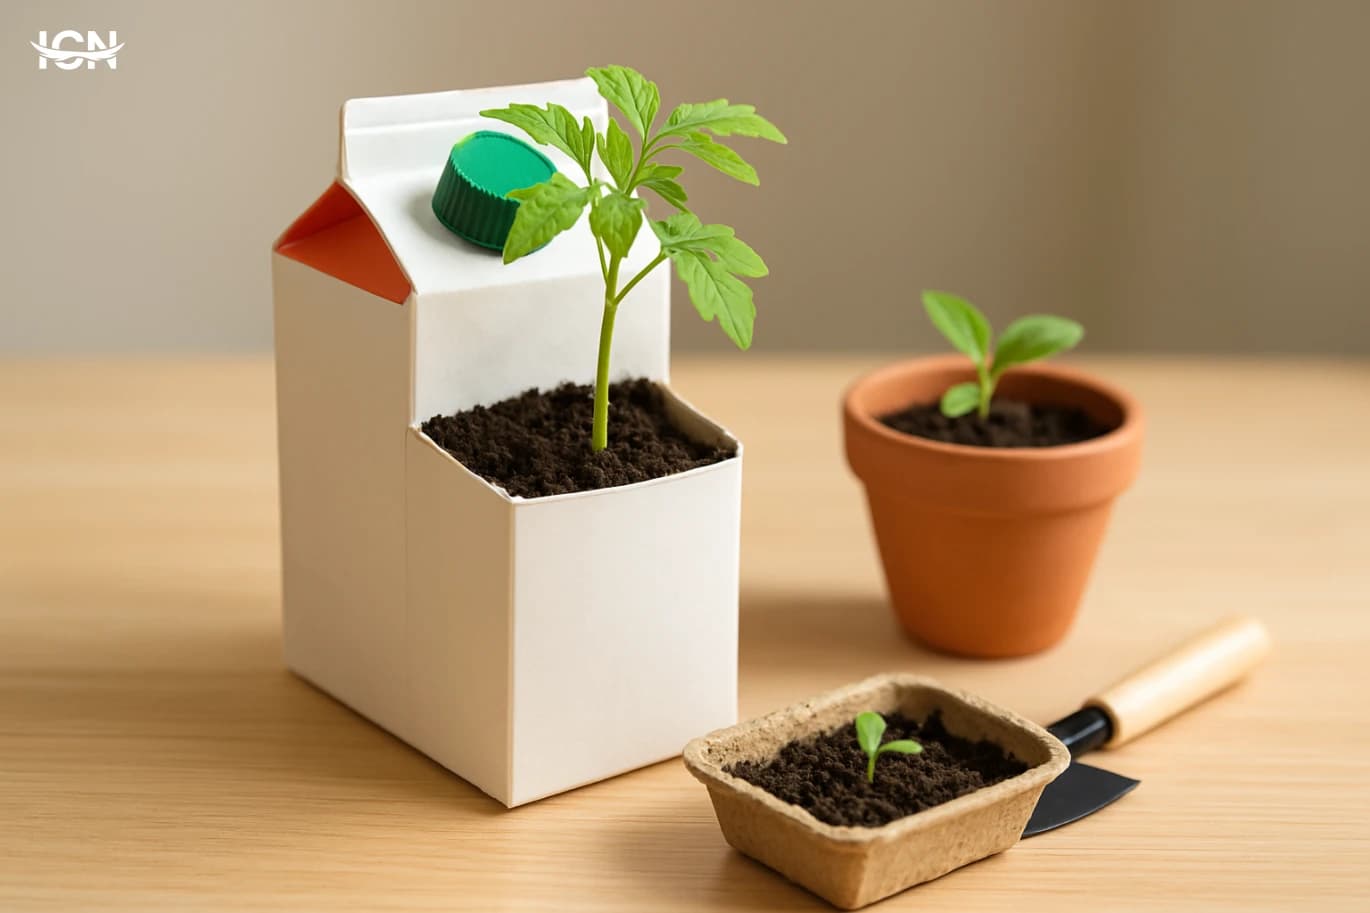
Turning empty juice cartons into a small garden is a practical activity that combines creativity with clear, hands-on steps. Children see a direct result: a container they cleaned and decorated becomes a place where seeds sprout and grow. That cause-and-effect experience supports patience and responsibility without needing long lectures. It also fits easily into family routines because the materials are common at home and the garden can live on a windowsill, balcony, or kitchen corner. The project is also a gentle way to introduce environmental habits. Instead of presenting recycling as an abstract rule, you show a simple example of reusing packaging for a new purpose. Kids learn that “waste” can become a tool. For parents, the activity is manageable: it can be done in short sessions over a few days—prepare the cartons, plant, then check moisture and growth. Each session has a clear goal, which helps children stay engaged. Finally, carton gardening is flexible across ages. Younger children can focus on washing, filling soil, and watering with supervision. Older children can measure, label, track growth, and compare different plants. The same basic setup can support different learning levels without turning the activity into a classroom lesson.
Materials and safe preparation
Start with cartons that held juice or milk alternatives, preferably with a flat base. Rinse them well, then wash with warm water and a small amount of dish soap. Let them dry completely to reduce odor and mold risk. For children, the key safety point is cutting: adults should handle any cutting with scissors or a craft knife, and children can do the non-sharp tasks like peeling labels and wiping. You will need: 2–6 empty cartons, potting soil (or a mix of soil and compost), small stones or gravel for drainage, seeds or seedlings, a marker, and optional paint or stickers for decoration. If you do not have gravel, torn pieces of egg carton can work as a light drainage layer. A tray or plate under each carton helps protect surfaces from water. Prepare drainage holes at the bottom. Make 4–6 small holes using a skewer or the tip of scissors, then widen slightly so water can escape. If the carton is very thin, reinforce the bottom by folding the base edges inward before making holes. For a child-friendly routine, set up a “planting station” on newspaper: one area for soil, one for seeds, and one for finished cartons. This reduces mess and makes the process feel organized. If you plan to place the garden indoors, choose a spot with bright light for at least 4–6 hours a day. A sunny window is enough for herbs and leafy greens. If light is limited, pick plants that tolerate partial shade, and keep expectations realistic: growth may be slower but still rewarding.
Planting step by step
1) Fill the base: Put a thin layer of gravel (about 1 cm) at the bottom. This helps excess water drain and reduces soggy soil. 2) Add soil: Fill the carton with potting soil, leaving 2–3 cm at the top so watering does not overflow. Ask children to tap the sides gently to settle the soil instead of pressing hard. 3) Choose what to grow: For quick results, pick fast sprouters such as cress, radish microgreens, basil, mint (better as a small seedling), or lettuce. If you want a longer project, try cherry tomato seedlings, but note they need more light and support later. 4) Plant correctly: For small seeds, sprinkle lightly and cover with a thin layer of soil. For larger seeds, make small holes with a finger and place one seed per hole. A simple rule kids can remember is “cover seeds about as deep as they are wide,” but you can also follow the packet. 5) Water gently: Use a small cup or a spray bottle. The goal is moist soil, not puddles. 6) Label and date: Write the plant name and planting date on masking tape and stick it to the carton. This turns the activity into a mini experiment and prevents confusion when you have several cartons. 7) Place and wait: Put the cartons on a tray near light. For the first week, check moisture daily. Many seeds sprout within 3–7 days. When sprouts appear, teach children to rotate the cartons every two days so plants grow straighter toward the light. If you are planting multiple cartons, try a “comparison set”: one carton with more light, one with less, or one watered slightly more (without overdoing it). Children can observe differences and learn that plants respond to care and conditions.
Daily care and simple troubleshooting
A carton garden succeeds with consistent, small actions. Set a routine: check soil moisture each morning or after school. Teach children to touch the top of the soil; if it feels dry, add a little water. If it feels damp, wait. Overwatering is the most common issue, especially in small containers. Watch for these signs: yellowing leaves can mean too much water or not enough light. Move the carton closer to a brighter window and reduce watering slightly. If seedlings look tall and weak, they are “stretching” for light; rotate the carton and increase light exposure. If you see fuzzy mold on the soil surface, remove the top layer gently with a spoon, improve airflow, and water less often. Thinning is another key step. When many seedlings sprout close together, they compete. Show children how to keep the strongest sprouts and remove a few others by snipping with child-safe scissors. This feels counterintuitive to kids, so explain that fewer plants can grow better in a small space. As plants grow, they may need nutrients. If you have compost, mix a small amount into the top layer after two to three weeks. If not, a mild liquid fertilizer used sparingly can help, but it is optional for short projects like microgreens. For herbs, harvesting is part of care: teach children to pinch leaves from the top so the plant becomes bushier, and never remove more than one-third at a time. Finally, keep hygiene simple. Empty the tray if water collects. Wipe any spills. If a carton becomes soft or leaks, place it inside another container or transfer the plant to a sturdier pot. Treat this as a normal part of learning rather than a failure.
Learning activities and family engagement
To keep children interested beyond the first sprout, add small learning tasks that feel like play. Create a growth chart: measure plant height twice a week using a ruler and write the number on a simple table. Younger kids can draw the plant instead of measuring. Older kids can compare two cartons and describe what changed. Introduce basic plant parts with real observation. Ask children to point to roots (if you transplant later), stems, leaves, and new buds. When watering, explain that roots take in water and nutrients, and leaves need light. Keep explanations short and tied to what they see. Make the cartons personal. Let children decorate with stickers or paint, but keep the planting area clean. Add a “name tag” for each carton, such as “Mariam’s Basil” or “Omar’s Lettuce.” Ownership increases follow-through. You can also connect the garden to meals. Herbs are ideal: once basil or mint is established, children can pick a few leaves for a salad, a sandwich, or infused water. The key is to set clear rules: wash leaves, use clean scissors, and harvest small amounts. This turns the garden into a family routine rather than a one-time craft. If you have multiple children, assign rotating roles: the “water checker,” the “label reader,” and the “cleanup helper.” Roles reduce conflict and teach teamwork. Keep the tasks short so the project stays positive and manageable.
When to harvest and what to do next
Harvest timing depends on what you planted. Microgreens and cress are often ready in 10–20 days. Teach children to cut with clean scissors just above the soil line. Herbs take longer; basil may be harvested once it has several sets of leaves, usually after 4–6 weeks in good light. Lettuce can be harvested as “cut-and-come-again” by taking outer leaves and leaving the center to regrow. After the first harvest, decide whether to continue in the carton or upgrade. Cartons work well for short cycles, but some plants outgrow them. If roots fill the space or the plant dries out quickly, transplant to a larger pot. Show children how to loosen the soil, lift the plant gently, and place it into a new container with fresh soil. This step teaches care and reduces the idea that gardening is disposable. You can also expand the project into a small “carton garden set.” Try one carton for herbs, one for leafy greens, and one for flowers that attract pollinators if you have a balcony. Keep the focus on practical outcomes: what grew best, what needed more light, and how watering habits affected results. When a carton garden ends, close the loop responsibly. Compost the old soil if possible, rinse and recycle the carton if your local system accepts it, or reuse it again for a new planting cycle. Children learn that finishing a project includes cleanup and planning the next step, not just starting something new.